Thursday, January 13, 2011

Cara Meningkatkan Mood di Pagi Hari

Pernahkan anda menyadari bahwa apa yang terjadi di pagi hari akan menentukan apa yang akan terjadi di sepanjang hari tersebut. Ketika segala sesuatu berjalan dengan lancar, anda akan cenderung merasa lebih tenang dan bersedia untuk menghadapi apapun yang akan terjadi pada hari itu. Bagaimana cara membangkitkan mood anda pada pagi hari dan kemudian akan membawa perubahan untuk 16 jam ke depan?

Kami telah berbicara dengan para ahli dan menyimpulkan 10 cara yang dapat membangkitkan mood anda sama seperti cerahnya mentari pagi yang baru terbit. Cobalah terapkan beberapa (atau semua!) cara ini untuk lebih bahagia dan lebih sehat.
1. Carilah satu kegiatan yang “memanjakan diri sendiri”
Ketika anda bangun, luangkan 30 detik bagi diri anda berpikir paling tidak satu kegiatan menyenangkan untuk anda lakukan pada hari itu.....dan lakukanlah. Ketika Alice Domar,PhD, seorang psikolog dan salah satu penulis Live a Little !Breaking the Rules Won't Break Your Health (Hiduplah! Melanggar peraturan tidak akan mengorbankan kesehatan anda), berada di Los Angeles untuk tur promosi buku pada suatu musim semi, dia bangun jauh lebih awal dari biasanya, daripada kesal karena kurang tidur, dia menyadari dia dapat melakukan suatu yang menyenangkan, yaitu berbelanja buah-buahan segar di supermarket terdekat, dimana hal tersebut merupakan hal yang mustahil untuk dilakukan kalau berada di rumahnya di Boston. Kegiatan belanja yang tak direncanakan tersebut, akhirnya membangkitkan mood dia pada hari itu.
2. Makan makanan bergizi seimbang.
Awali pagi hari anda dengan mengkonsumsi berbagai campuran nutrisi dari karbodidrat kompleks dan protein yang dapat mengenyangkan perut anda hingga saat makan siang tiba, seperti oatmeal (sejenis makanan dari gandum) atau roti panggang dengan selai kacang (termasuk taburan sedikit kayu manis, yang dapat membangkitkan mood dan konsentrasi). Penelitian yang lain menemukan bahwa jumlah kafein dalam takaran sedang (200 mg, atau jumlah yang sama dengan 2 gelas kopi) dapat membangkitkan mood dan ketajaman mental, nikmatilah segelas kopi atau teh hitam dalam menu sarapan anda.
3. Hiruplah udara segar
Keluarlah untuk melakukan beberapa gerakan fisik yang “ramah lingkungan” -- aktifitas fisik yang biasa dilakukan di luar ruangan -- bahkan jika anda hanya memiliki waktu beberapa menit saja. Para peneliti menemukan bahwa orang yang melakukan aktifitas olahraga, termasuk diantaranya berjalan dan berkebun, dapat membangkitkan mood dan kepercayaan diri yang lebih tinggi meski hanya dilakukan beberapa menit. Penelitian tersebut juga menemukan bawah olahraga dekat air dapat memperkuat efek dari olahraga yang kita lakukan, jadi jika anda tinggal dekat danau, sungai atau air terjun, itu adalah sesuatu yang baik.
4. Dengarkan suara alam
Dapatkan keuntungan dari suasana luar ruangan, meski jika anda tidak dapat keluar, cobalah gantikan dengan cara mendengar kaset atau CD yang berisi suara-suara alam. Dalam penelitian baru-baru ini, ditemukan bahwa para sukarelawan sembuh dari kondisi stress mereke lebih cepat ketika mereka mendengarkan suara alam kombinasi dari air yang mengalir dan suara-suara burung berkicau. Bukalah jendela anda di pagi hari, dan dengarlah suara alam. Atau anda dapat juga menggantikan suara alarm anda dengan suara-suara alam sehingga anda dapat bangun dengan kondisi lebih baik.
5. Fokuskan pada suasana hati yang baik.
Begitu anda bangun, Robyn Mckay, PhD, seorang psikolog yang tinggal di kota Tempe, Arizona AS, dan juga merupakan pendiri program latihan Smart Girl-Modern Goddess (sebuah Produk Podcast), merekomendasikan untuk menarik nafas yang dalam sebanyak 5 kali dan buatlah keputusan untuk membuat suasana hati baik pada hari itu. “Bayangkan, meski anda sedang frustrasi ataupun kaget, anda harus selalu ingat untuk menarik nafas yang dalam dan bertindak dengan bijaksana sesuai dengan keadaan anda,” katanya. Dr. McKay juga menganjurkan anda harus sering menarik 5 kali nafas yang dalam sepanjang hari, dan terus ingatkan diri anda sendiri agar membuat keputusan yang dapat membuat suasana hati anda jadi lebih baik.
6. Minum Coklat Hangat
Sebuah studi baru-baru ini menemukan bahwa minum minuman yang mengandung coklat dapat memperbaiki mood dan tingkat konsentrasi dari peserta penelitian --- bahkan pada saat mereka harus menyelesaikan soal matematika yang sulit. Jadi cobalah untuk menikmati coklat hangat yang rendah lemak atau susu skim dan coklat hitam. Protein dan karbohidrat di dalam susu akan membantu anda menjaga kadar gula darah anda agar tetap stabil sampai makan siang, dimana juga akan menjaga suasana hati anda tetap baik.
7. Cari waktu untuk menilai diri anda sendiri.
Jangan langsung turun dari tempat tidur ketika anda baru bangun. Luangkan setidaknya 5 menit untuk memberi perhatian pada tubuh anda dan rasakan apakah anda merasa tubuh anda sedikit kaku, kemudian cobalah untuk merentangkan tubuh anda dan ambillah nafas yang dalam, saran Lynn Louise Wonders, seorang psikoterapis dan guru yoga di Marietta, Georgia AS. Dia mengingatkan, “Sebelum bersiap-siap untuk menyelesaikan ribuan tugas anda pada hari ini, akan sangat baik untuk meluangkan waktu 5 menit untuk membangkitkan mood, mempersiapkan tubuh dan nafas anda. Anda akan merasa anda akan lebih siap untuk menghadapi semua urusan anda yang sedang menanti anda di hari itu.”
8. Bayangkan hal yang negatif.
Anda mungkin pernah mendengar bahwa bersyukur adalah sebuah cara pembangkit mood yang baik, tetapi ada sebuah cara lain untuk mendapatkan hasil yang sama. Coba bayangkan hal positif dalam hidup anda -- seperti bagaimana anda mendapatkan kerja impian anda, bertemu dengan pasangan ideal anda -- dan kemudian bayangkan bagaimana keadaan hidupmu jika itu tidak kamu punyai sekarang. Pastinya Anda akan merasa bersyukur. Meskipun cara ini kadang kala akan memberikan efek yang berlawanan, akan tetapi sebenarnya dapat membangkitkan mood dari salah satu peserta penelitian lebih baik dibandingkan dengan hanya membayangkan efek positif saja.
9. Menghirup aroma mint
Para peneliti menemukan bahwa menghirup sesuatu yang beraroma mint dapat membangkitkan mood dan juga melawan rasa lelah. Cobalah untuk menaruh sebotol minyak beraroma peppermint dan sekantong teh pepperimint di sebelah tempat tidur anda, sehingga anda dapat menghirup aroma positif tersebut di saat anda bangun. Cara lain yang dapat membawakan suasana hati tenang bagi anda adalah mengunyah permen karet, cara ini dapat membangkitkan mood, konsentrasi dari salah satu peserta penelitian. Kunyahlah sebuah permen karet rasa peppermint setelah sarapan pagi.
10. Tersenyumlah
Ada satu hal yang dapat anda lakukan dimana saja anda mau: tersenyum. “ Ingatlah!”, kata dr. Mckay, “ tersenyum adalah sebuah cara yang sederhana untuk mengubah mood anda -- dan juga mengubah mood dari orang-orang disekitar anda.” Jadi tebarkan mood baik anda dengan memberikan senyuman sesering mungkin, di pagi hari ataupun sepanjang hari anda.

Saturday, January 8, 2011

How to Paint a Room

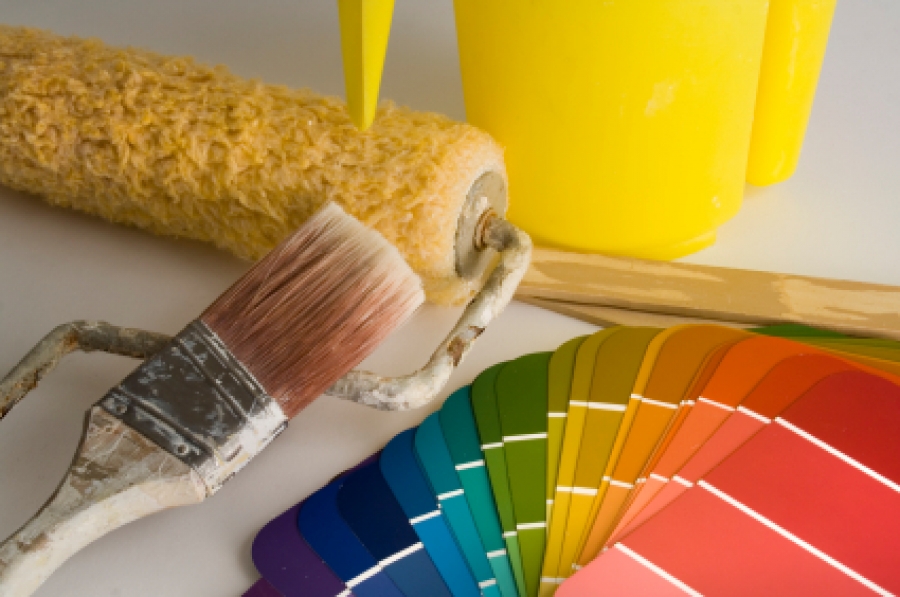
Painting Eqipment
Image Source: http://buildipedia.com

Even though we'd love to spend our whole summer break holidays nerding away here at Passy World, there are also some domestic jobs that need attending to.

One of these involves beautifying Passy World by doing some indoor painting. Since we have spent a bit of time on YouTube doing a crash course in Painting, we thought we'd share the results with you right here.

Unfortunately we didn't find any amazing computer technology that simplifies the tasks of painting, So for redoing our room, it looks like it's all brushes and rollers.

No doubt for large scale Industrial jobs there are amazing paint Robots, and all sorts of computerised wizardy, but here at Passy World, the ipod music in the ears will be the only advanced technology we will be using.

YouTube How to Paint Videos

The "SHCS" have an excellent channel on YouTube of more than 30 videos on how to paint, and these are high quality productions.
Access these videos using this link: http://www.youtube.com/user/TheSHCS

The "ExpertRealEstateTips" channel on YouTube is also very good, and has some videos that we have featured later in this post.

So after an exhaustive search of the web, here is Passy World's Free six step "Painting 101" course, for anyone who's never handled a paint brush.

Step 1 - Getting all the Equipment Together

This is not exhaustive, and might be incomplete, but this is what we think we will need for our paint job.

Equipment List: Paint, small buckets or ice cream containers for holding paint, Ladder, an Edger Tool, Mini Roller, Big Flat thin brush, Angled brush with thin tip, Large Roller, Paint Pan, Roller extension handle, Drop Sheets, Old Newspapers, Box Cutter, Blue Masking Tape, Caulking Gun, Caulking Filler, Filler knife trowel, Sandpaper, Sugar Soap Wall Wash, Overalls, and a Peaked cap to keep paint off hair and face, ipod or radio, latex disposable gloves, old towels, sponges, and rags for mopping up, water bucket.

Just remember that it is very important to be extremely careful when bringing all of this brand new equipment home from the shops:

Sorry Picture Not Found
Image Source: http://media.ebaumsworld.com

Possibly some very slow careful driving back from the paint store will be the order of the day.

Sorry Picture Not Found
Image Source: http://thelostjacket.com

Step 2 - Preparation

How To Prep For Painting


First of all we are going to need to fill up all those gaps with a Caulking Gun.

How to Cut the tip off a Tube off a Caulk Filler.


How to do the Caulking & Bridging of Large Gaps.


The next job will be taping up all of the parts we don't want to paint.

Here is a video on How to Apply Masking Tape to Skirting Boards.


Step 3 - Cutting In Brush Painting

Basically we need to go around all the edges first, which is called "cutting in", and then we get to do the rolling.

First of all, How to Cut In on Walls.


Here is a bit more about Cutting in Wall Areas.


We also need to know "How to Paint the Corners of Rooms", as part of the cutting in work.


Step 4 - Painting with the Roller

Once we have done all the fiddly cutting in, we are ready to do the rolling.

How to Use a Roller - Basics


The "SHCS" guys reckon that walls should be painted in long vertical strokes progressing along the wall. This is probably great on big walls, but for smaller areas like kitchens, perhaps the horizontal, then finishing off vertical method might be better.

Here is a great video on putting it all together to paint a whole room.


The guy who made the previous video has a great series of videos on YouTube under the "ExpertRealEstateTips" channel. As he emphasises in his videos, it is paramount to do a clean tidy job. Taping old newspapers over all windows and cupboards is a must.

Sorry Picture Not Found
Image Source: http://farm3.static.flickr.com

Step 5 - Painting Doors

How to Paint a Paneled Door - there is a definite method for painting those fancy paneled doors that most people have in their houses these days. We found a great pair of videos on YouTube on how to do this the correct way.

Here is the first video - "Part 1 - The Panels".


Now for the second video: "Part 2 - The outsides flat sections".


Step 6 - Getting Help

Our final tip is that no matter how much they plead with you, NEVER let the kids help with the painting, or get anywhere near any of the equipment!

Sorry Picture Not Found
Image Source: http://www.mediabistro.com

So there won't be any blog posts for a while, because Big Passy will be doing a lot of Van Goughing around the house the next few days. Needless to say he'd much rather be out painting the town, than painting the house.

Enjoy,
Big Passy Wasabi

Friday, January 7, 2011

Flash Talking Animals


Make sure you have your speakers on, and click the round circles to see and hear the marvelous animals.

Here at Passy World, we recently saw a very popular free app on the IPad, where infants can tap a thumbnail clipart of an animal, and then the screen can go full size, showing a photo of the animal and making the sound the animal makes. We decided we would make a similar game in Adobe Flash using Actionscript 3.0 .

We built the project up gradually in steps, using videos from YouTube to find out the technical bits we needed to include in our project. Step by Step building and testing is always a great approach to creating new apps, and we thoroughly recommend this methodology.

First we needed a project where we can click a thumbnail and then have the picture go full size. We found the following YouTube project that fitted this requirement.


So our first stage of building the project was to make some small 70x70 pixel button images with animal names written on them like Cat, Dog, Pig, Cow, Bird, etc, as well as find some good pictures of these animals on Google Images. The pictures can be resized in Flash, however for file size optimisation we resized them first using Photoshop to around 450x450 Pixels.

We got some nice button template backgrounds off the web, and then used Fireworks to make our buttons. It is important to make the button edges smooth by making the background transparent, and then painting around the button edge (use soft rounded brush) in the same hex color as the Flash background is.

We made our Flash project 540x360 pixels, so that it would easily fit on our blog page, and made a heading and changed the background color.

Next we followed the YouTube video and got our project going to that we could click a button, and have the image of that animal displayed on the stage.

Note that we found in CS3 we do not have the "chain link" resize option in properties, and so had to use the Flash resize tool (3rd down on tools side bar).

However, we later realized that CS3 has this same function when you have the size padlock undone in the properties.

It is also important to remember on the pictures layer in Flash to label the frame in the properties as pic1, pic2, pic3, etc.

This completed Step 1 of our Project. We tested it and our buttons and pitures worked well.


Step 2 of the Project

The next task was to get some MP3 animal sounds from the web. We found the following great websites with free sounds. If they fail to downlaod, then just use right click "Save Target As" on the download icon for each one.

http://www.freesound.org
(have to join up using an email address, but it's totally free) and http://www.freeinfosociety.com .

We used Roxio Media Creator to edit and convert WAV and FLAC sounds into MP3's where required. (Flash works best with MP3s).

The mp3 sound files do NOT go into the Flash Library. Instead, they have to be stored in the same location as the Flash SWF file. This can be a folder on the PC for testing, and later on at our website on the Internet.

There is a PDF document later in this blog post which has the Actionscript Code for importing in the sounds, and making them play when buttons are pressed.

Here is our Step 2 Flash Project that contains Fireworks buttons in it, and our animal sounds.


Step 3 of the Project

The third and final step that could be done to this project would be to make our buttons a bit fancier. However to do this, we found that we needed to replace the buttons we made in Fireworks, with some Flash buttons, so that we could introduce lighter colored rollover states and so on.

Here is a Video that shows how to make these type of Flash buttons. Click on the 360p bottom right hand controller and watch it in HD as Full Screen.


However, we found that we could edit our Fireworks buttons in our existing project. All we have to do is double click the "btn1" object in the Library, and this will take us into button editing mode, just like in the YouTube movie.

We copy into the "Over" state frame, and then we click on the button, and in the Properties, change the color box to be "brightness" and set the slider up to 30%. This will make a lighter color button as our rollover button.

However, because we colored in around our round buttons in blue, our buttons now become squares when moused over and don't look so good. We therefore decided to abandon the Fireworks buttons.

So we really need to modify our project, and remake the buttons in Flash. (Font used in Flash was a simple Century Gothic size 22).

The approach was to remake the buttons in Frame 1 of the buttons layer, get them working, and then F6 Insert keyframe copy them into frames 2 and 3.

Now that we had new Flash buttons, we went in as per the YouTube Video and made them go darker when moused over, by clicking on the rectangle**, and changing it to a darker blue, like the guy did in the video. Note that we can click the button on the stage, or in the library to get into edit mode on it.

**We found we had to click off the button and then back onto it while in the button editor to get to the rectangle. Note that we made our "rectangles" so rounded that they became circles, we did this by setting the roundness to 34, back when we drew them.

This third version of the Project is the one that is actually at the start of this blog post.

Here is a PDF document showing the Actionscript Code:


If you would like to have your own full size copy of this PDF, then simply click the save disk icon button on the PDF viewer, and you should be able to save it to your own hard disk.

Alternatively, you can view or save the full size PDF by clicking the link below:


If you would like to download a zip file of the final version of our project, then click here.
Choose the save option in your web browser, and save this to your hard drive.

http://www.passyworld.com/AS3Animals/Animals.rar

Winrar is a free download that can then be used to extract the .FLA flash project file. Get "Winrar" for free at http://www.cnet.com/topic-software/winrar.html

So that's enough Doctor Doolittle-ing with the talking animals for now.

Enjoy,
Big Passy Wasabi

Thursday, January 6, 2011

Parental Friday Funny

guys with bottles
Image Source: http://cdn.yusrablog.com

This Friday Funny goes out to all the parents who are spending quality time with their kids over the Christmas holidays.

The title of this first video says it all.


Here is another video along the same lines. But really can you blame the parents for just wanting to play with their kids?


Being a dad has certainly changed over the years, and here's proof of that.

Fathers Then & Now

Fathers of 1900 didn't have it nearly as good as fathers of today; but they did have a few advantages:

In 1900, fathers prayed their children would learn English.
- Today, fathers pray their children will speak English.

In 1900, a father's horsepower meant his horses.
- Today, it's the size of his minivan.

In 1900, if a father put a roof over his family's head, he was a success.
- Today, it takes a roof, deck, pool, and 4-car garage. And that's just the vacation home.

In 1900, a father waited for the doctor to tell him when the baby arrived.
- Today, a father must wear a smock, know how to breathe, and make sure film is in the video camera.

In 1900, fathers passed on clothing to their sons.
- Today, kids wouldn't touch Dad's clothes if they were sliding naked down an icicle.

In 1900, fathers could count on children to join the family business.
- Today, fathers pray their kids will soon come home from college long enough to teach them how to work the computer and set the VCR.

In 1900, fathers pined for old country Romania, Italy, or Russia.
- Today, fathers pine for old country Hank Williams.

In 1900, a father smoked a pipe.
- If he tries that today, he gets sent outside after a lecture on lip cancer.

In 1900, fathers shook their children gently and whispered, "Wake up, it's time for school."
- Today, kids shake their fathers violently at 4 a.m., shouting: "Wake up, it's time for basketball practice."

In 1900, a father came home from work to find his wife and children at the supper table.
- Today, a father comes home to a note: "Jimmy's at baseball, Cindy's at gymnastics, I'm at adult-Ed, Pizza in fridge."

In 1900, fathers and sons would have heart-to-heart conversations while fishing in a stream.
- Today, fathers pluck the headphones off their sons' ears and shout, "WHEN YOU HAVE A MINUTE.."

In 1900, a father gave a pencil box for Christmas, and the kid was all smiles.
- Today, a father spends $800 at Toys 'R' Us, and the kid screams: "I wanted X-Box 360!"

In 1900, if a father had breakfast in bed, it was eggs and bacon and ham and potatoes.
- Today, it's Special K, soy milk, dry toast and a lecture on cholesterol.

In 1900, a Father's Day gift would be a hand tool.
- Today, he'll get a new iphone app.

In 1900, a happy meal was when Father shared funny stories around the table.
- Today, a happy meal is what Dad buys at McDonald's.

In 1900, a father was involved if he spanked the kid now and then.
- Today, a father's involved only if he coaches Little League and organizes Boy Scouts and car pools.

In 1900, when fathers entered the room, children often rose to attention.
- Today, kids glance up and grunt, "Dad, get out of the way of the television."

In 1900, fathers threatened their daughters suiters with shotguns if the girl came home late.
- Today, fathers break the ice by saying, "So...how long have you had those face piercings and full body tattoos?"

In 1900, fathers were never truly appreciated.
- In 2011, fathers are never truly appreciated.

Jokes Source: http://www.ahajokes.com

Today we may have all the mod cons, but there is still a lot of Bad Parenting going on out there.

picture description
Image Source: http://media.ebaumsworld.com

Here are a couple of wonderful crusaders of all things good, showing us exactly how we can help re-educate all of those bad parents.


But when all else fails putting up with the kids on holidays; desperate times call for desperate measures.

kids in pets transport
Image Source: http://images.paraorkut.com

We need to trust our evolutionary instincts, and remember it's all about the whole family thing.

apes with kid
Image Source: http://images.paraorkut.com

In this difficult day and age, it's up to the parents to take control and teach their kids all the right things.

Things My Mother Taught Me
  • My Mother taught me LOGIC..."If you fall off that swing and break your neck, you can't go to the store with me."
  • My Mother taught me MEDICINE..."If you don't stop crossing your eyes, they're going to freeze that way."

  • My Mother taught me TO THINK AHEAD..."If you don't pass your spelling test, you'll never get a good job!"

  • My Mother taught me ESP..."Put your sweater on; don't you think that I know when you're cold?"

  • My Mother taught me TO MEET A CHALLENGE..."What were you thinking? Answer me when I talk to you...Don't talk back to me!"

  • My Mother taught me HUMOR..."When that lawn mower cuts off your toes, don't come running to me."

  • My Mother taught me how to BECOME AN ADULT..."If you don't eat your vegetables, you'll never grow up.

  • My mother taught me about GENETICS..."You are just like your father!"

  • My mother taught me about my ROOTS..."Do you think you were born in a barn?"

  • My mother taught me about the WISDOM of AGE..."When you get to be my age, you will understand."

  • My mother taught me about ANTICIPATION..."Just wait until your father gets home."

  • My mother taught me about RECEIVING...You are going to get it when we get home.

  • and my all time favorite thing - JUSTICE..."One day you will have kids, and I hope they turn out just like YOU..then you'll see what it's like."
Jokes Source: http://www.ahajokes.com

Here is an excellent summary diagram of how this whole passing on of all things valuable occurs within the modern close-knit family unit.

picture description
Image Source: http://4.bp.blogspot.com

But it's not all nasty unhapiness, and there are still plenty of fun times to be had for the modern family.

For example, parents just love to dance and so do their kids.
Because Dancing is fun... right?


Let's hope you all get to enjoy some quality family time this weekend.

Enjoy,
Big Passy Wasabi

Wii Grand Slam Tennis

Nadal plays a big shot
Image Source: http://www.wiids.co.uk

At one of the recent post Christmas sales, we picked up a heavily discounted copy of Wii Tennis. This game has been out for a while, and friends of ours had said it was good. They were not wrong! This is a great game and is so realistic and addictive, it even surprised us here at Passy World.

We highly recommend getting it if you have a Nintendo Wii. If you don't already have a Wii, then get one, because they are great fun, especially when friends come over to visit, or if you want to play against all sorts of random people online.

Here is Grand Slam Tennis Intro video by EA Sports.


The game has lots of famous players and tennis courts from all around the world. There is even the Austalian Open with the real commentators such as John Newcombe and Pat Cash. In addition, there is a pro shop where you can pimp up your players.

This next video is a Grand Slam tennis in depth tutorial by EA who are the makers of the game.


Serving is tricky for beginners. You need to use the Wii controller to toss up, and then just swing down and flick your wrist at the end to get a powerful serve. So basically you toss up, and serve all with the one hand. This is the only part of the game that is different to real tennis. Everything else in playing the game is just like the real thing. It is indeed an awesomely realistic game.

Here is a video that gives some useful advice about Serving, and moving in to the net, to play serve/volley style games.


One thing not mentioned clearly in any of the tutorials we have seen thus far, is using the A and B buttons. Eg. With our controller we found we were able to press the A button to do a high Lob, and use the bottom of controller back button to make shots land in short close to the net. This is very useful to know, and definitely helps win points.

With the Australian Open Tennis coming up this month here in Melbourne, it is the perfect time to be playing this game here at Passy World.

So let's swing those controllers and serve up some aces!

Enjoy,
Big Passy Wasabi

Monday, January 3, 2011

CS3 Flash Modern Slideshow

Intro Pic of Flash Project

This post is all about making your own basic Photo Slideshow using Adobe Flash CS3. Below is a Photo Slideshow we made here at Passy World.

(It is 1 MB is size and may take a little while to load in).


Click the controller in the top right hand corner to progress through the photos.
(Right hand double arrow = Autoplay continuously).


Making the above slideshow involved using an existing template that comes with Flash Cs3. When it runs full size it is 640x480 pixels in size, and the caption text at the bottom of each photo is a little larger and easier to read.

In CS3 Flash, to access the free template and get started we simply do:


File > New > Templates tab > then More.. > 'Photo Slideshows' > 'Modern Photo Slideshow' .

We can then do Control > Test Movie, (or Ctrl-key + Enter), to run the sample slideshow and try it out.

The default Flash project had a big ugly controller, and so we did some editing** to remove most of it, and end up with a small streamlined controller in the top right hand corner of screen.

** This editing involved a lot of picking and clicking to find each of the items that we wanted to delete or modify.

If you would like a ZIP file containing our modified Template .FLA file, then click the link below and save the zip file to your own hard drive.

Winrar is a free download that can then be used to extract the .FLA flash project file.
Get "Winrar" for free at http://www.cnet.com/topic-software/winrar.html

Download our Passy World Slideshow Template by clicking the link below, and then saving the file to your hard drive using your web browser.

http://www.passyworld.com/passyMisc/PassySlideshowTemplate.rar


Resizing our Photos to 640x480 Pixels for Flash

The one drawback for this slideshow is that we have to have all the pictures we are going to use saved as JPG's and all sized at 640x480 pixels.

However, if we have Adobe CS3 Photoshop, resizing is very quick and easy. The Crop tool can be set to 640px x 480px maximum size, and provided our photos are bigger than this required 640x480 size, we can crop a section of photo, save it as .JPG, and it will be the exact correct size for our Flash project.

Photoshop Crop Settings

Note that we saved each of our 640x480 photos in Photoshop using "Save for Web and Devices" as JPG type, with quality set to "High".


Replacing the Default Flash Project Photos

To replace the default photos with our own photos, we have to go to the Library in Flash, (Window > Library), and then click on the "photos" folder.

Next double click on the tree icon next to the first photo, which should bring up the following panel:


Photo Properties Panel

Now click the Import button, and on this panel, navigate to our own photo, and click "open" to have it replace the default photo. We also have to manually rename the photo to change its name in the Library.

Next we need to change the caption at the bottom of the photo. First we need to click the correct black dot keyframe on the "pictures" layer to get our desired photo is displayed.

We then click on the same position black dot in the "Captions" layer, and this should take us into edit the caption. We then need to click on the "T" text tool, then click our mouse into the caption and edit it:

Caption Modifying

After the caption is edited, simply change off the "T" tool and onto the black pointer arrow tool, and then click off the caption area, and we are done.

We can repeat this process for the next three photos we have, since the default project comes with a total of four photos.


Adding Extra Photos to the Slideshow Project

Firstly we need to add each of our 640x480 photos into the Flash Library. Do
File > Import > Import to Library > then navigate to the photo we want, and click open.


(It sometimes takes a couple of seconds for the photo to be imported). We then need to drag the photo from its place in the Library into the "Photos" folder.


Next we have to click at the top of the Flash Timeline and highlight in red all of the last frames like this:

Insert new blank frames

We then do Insert > Timeline > Frame, (or Press F5), which will produce a set of blank frames at the next position at the end of the current timeline.

We now click onto the "Picture" Layer, where the new empty rectangle shaped frame is, and do Insert > Timeline > Keyframe, (or press F6). This will make a duplicate copy of the last photo in the animation. We now click on this photo on the Stage, and in the properties panel we click the "Swap" option.

Swap picture function

On the resulting panel we can click the new photo we just imported, and it will be swapped in onto the stage. All we have to do now is the Caption.

Click onto the Caption at the last current frame, and do Insert > Timeline > Keyframe, (or press F6). This will make a duplicate copy of the latest caption.
We then click onto the "T" text tool in Flash, and we can then edit in a caption for the new photo we have just added.

We now repeat the following process for all of the photos we need to add:
  • Import our next photo to the Library, and move it to the Photos folder.
  • With all of the last frames highlighted in red, Press F5, (or do Insert > Timeline > Frame).
  • Click on the Pictures Layer and Press F6, (or do Insert>Timeline>Keyframe).
  • Click the picture on the stage, and in the properties panel do the Swap to bring in our new picture.
  • Click on the Captions Layer and Press F6, (or do Insert>Timeline>Keyframe).
  • Use the "T" tool to edit the caption for our new photo.

Deleting Photos

Click on the top of the timeline of the frames you want to remove, and do
Edit > Timeline > Remove Frames.


Making the Slideshow Start Automatically

If we want to have the slideshow start by itself as soon as the page loads, then we need to change some of the Actionscript Code. This is detailed in the following PDF. Click the link below to access the PDF instructions document.

http://www.passyworld.com/passyPDFs/SlideshowAutoStart.pdf

If you would like to download our Passy World Auto Slideshow Template, then click the link below, and then save the file to your hard drive using your web browser. (Use Winrar to expand the .RAR file out to the .FLA file).

http://www.passyworld.com/passyMisc/SlideshowTPauto.rar


Putting the Slideshow onto a Web Page

Our Slideshow with 12 photos ended up just under 1 meg in size, and so it takes a few seconds of load time on the web page or blog.

We could use Dreamweaver to make a new HTML page, and then use Insert function to put our Flash onto the DW page. However for our Blog post here we have uploaded the .SWF file to our live "Passy World" website and then used the following blog post insert code:

(Note that the actual code needs to go continuously across the page and must not have the large spaces between items shown here. It also must not have any line returns, and needs to run continuously as one big long line of text.).

SWF embed code for Slideshow

So that's it for making a Photo Slideshow using Flash CS3.

If you would like a much more sophisticated and easy to use Flash Slideshow maker, then we suggest you use Wondershare's "Flash Gallery Factory Deluxe".

Click the link below for details on how to buy this great software that we use right here at Passy World on a regular basis:

http://www.wondershare.com/pro/flash-gallery-factory-deluxe.html


Enjoy,
Big Passy Wasabi

Sunday, January 2, 2011

Making Drop Down Menus

Sorry Picture Not Found

Shown above is a new drop down menu we have added to our "Passy World" website. We created these menus using Dreamweaver's Spry functionality.

Making a Spry Drop Down Menu Using Dreamweaver

Dreamweaver has very useful "Spry" functionality, which allows a quick way of building a set of drop down menus. We have used Dreamweaver DW CS3 to create our menus shown in the image above, but this can probably be done in newer versions of DW as well.

This first video shows the basics of how to make a Spry drop down menu.


Here is a more detailed Video on Horizontal Spry Menus.
(Don't worry laddies and lasses, you will get used to this guy's accent quickly).


After pressing Play, make sure you increase the resolution from 360p to 720p and go full screen to get a very clear high definition video.


Here is a follow-on video about how to customise the Spry Menu.

After pressing Play, make sure you increase the resolution from 360p to 720p and go full screen to get high definition imagery that shows the CSS code clearly.

Watch this video very carefully, and do exactly what the guy says, especially when putting in your own repeating gradient backgrounds.


On our Passy World site, we decided we would make an APDiv to put the menu inside, so that we can easily mouse drag and reposition it on our page using Dreamweaver.

We then inserted a Spry Menu Bar into the APDiv, and adjusted it (as per the YouTube videos we had watched), to have all the headings we wanted across the top of our page.

This process automatically created a new "Spry Assets" folder in our site definition, that we then needed to upload to our live website, along with our new copy of the Index Page.

The CSS modifications were a bit tricky, and for some of the links we had to go into code view and manually add target="_blank" to make each listed link open as a new page.

We created a gradient see-through background "blueGrad130x40.PNG" using Fireworks, as per the Scottish guy's video, and used this as our background for the menu bar. It is very important to set this background to "Repeat" or we end up with white bits on our longer submenu names.

We also had to make all background colors transparent, and replace all the "SpryMenuBarDown.gif" and "SpryMenuBarDown.gif" images for backgrounds, with our own "blueGrad130x40.PNG" image.

Also on each new link we make for a menu item, we need to click on the text for the menu item, paste in the link, and then underneath this box in proerties, set target to "blank" so that is opens in a new page.

With the CSS it is a matter of trial and error, try changing things to bright red and preview in a browser, to work out what part of the bar they effect. Eventually we got something we liked, but it took about 2 hours to figure it all out.

The CSS changes all get written automatically to a file called: "SpryMenuBarHorizontal.css" in the "SpryAssets" folder, and this whole folder needs to be migrated along with Index.html, and the menu image "blueGrad130x40.PNG", to our live website in the USA.

Here is the final CSS that we ended up with for the Passy World Spry Menu:


If you would like to have your own full size copy of this PDF, then simply click the save disk icon button on the PDF viewer, and you should be able to save it to your own hard disk.

Alternatively, you can view or save the full size PDF by clicking the link below:


There was only one minor problem with the upload to our live site. Eg. Because the "PWorldImages" folder does not live under a "PworldHome" folder on the real site, and so we had to go and edit all the paths in the CSS code and remigrate it.

We also found out how to remove the annoying white border around our website by setting up this code in the Index page HTML:

Sorry Picture Not Found

Testing of the new Homepage with Spry menu was done in Firefox, IE, and also Safari on the iPad, and they all came up okay.

Click the following link to check out our new Spry Menu on the Passy World homepage for yourself:

http://www.passyworld.com/

This "Passy World" website is one that we are slowly developing so show how Dreamweaver and Fireworks can be used for website building.
It also supplies some quick and easy links to some of our Facebook photos.

Here are some links to some other blog posts related to the building of our Passy World site:

Design-homepage-in-fireworks.html

Make-homepage-in-dreamweaver.html

Make-contact-us-webpage.html

Making-an-iframe-web-page.html


Finally, here are some additional videos we found for making Tabs and Menus in Dreamweaver by coding your own HTML and CSS, rather than using the built in Dreamweaver Spry functionality.

They claim that these type of menus are faster than the DW Spry ones. The videos certainly offer a good insight into how the CSS works to style up lists into nice menus, and are definitely worth watching for learning value.


Making Tabs in Dreamweaver using CSS

This video shows how to make a set of horizontal tabs that can link to other pages.
It uses raw HTML code and CSS code, and is very clearly explained step by step.

Not sure if this is exactly what we could use on our Passy World page, but it is interesting. Here is the Part 1 of 2.


And here is the second part of this video.


Making a Menu with Drop Down Links using CSS

This video shows really well how to use raw HTML and CSS, (instead of inserting a Spry), to create a Horizontal roll over drop down list menu.
The tutorial is in two parts. Here is Part 1.


And here is the second part of this video.


So that's it, now we can easily update our Menus with new drop down items and links as we need them. Very Nice.

Enjoy,
Big Passy Wasabi